
Are you looking to master the art of boiling eggs? Whether you’re a novice in the kitchen or an experienced cook, knowing how to boil eggs to perfection is an essential skill. Boiled eggs can be enjoyed in various recipes, from breakfast classics to delicious appetizers and salads.
In this comprehensive guide, we will take you through the step-by-step process of boiling eggs, providing expert tips, troubleshooting advice, and alternative methods. Get ready to unlock the secrets to perfectly boiled eggs and elevate your culinary skills. Let’s dive in!
Preparing the Eggs
Before we embark on the boiling process, it’s essential to prepare the eggs properly. Let’s explore the necessary steps:
Choosing Fresh Eggs
The freshness of the eggs plays a crucial role in the final result. Fresh eggs not only taste better but also have firmer whites, making them easier to peel. When purchasing eggs, check the expiration date and choose the freshest ones available.
Washing the Eggs
Even though eggs come with a natural protective coating called the bloom, it’s essential to wash them thoroughly. Use warm water and a gentle scrub brush to remove any dirt or bacteria that may be present on the shells. This step helps maintain good hygiene and reduces the risk of contamination.
Piercing the Eggs
Piercing the eggs before boiling can prevent them from cracking during the cooking process. Gently tap the rounded end of each egg with a small pin or an egg pricker. This tiny puncture allows air to escape and minimizes the chances of the shell cracking while boiling.
Organizing the Cooking Space
Preparing a well-organized cooking space is essential for a smooth boiling process. Gather all the necessary equipment, such as a saucepan, eggs, water, timer, and slotted spoon, before you start. Having everything readily available saves time and ensures a stress-free cooking experience.
Now that the eggs are properly prepared, let’s move on to the boiling process itself.
Boiling the Eggs
The boiling process sets the stage for perfectly cooked eggs. Follow these steps:
Choosing the Right Saucepan
A saucepan that accommodates the number of eggs you plan to boil is crucial. It should have enough space for the eggs to be submerged in water without overcrowding. Using a small saucepan may result in uneven cooking or potential cracking.
Adding Water to the Saucepan
Fill the saucepan with enough water to cover the eggs completely. Ensure there’s an additional inch or two of water above the eggs. This extra water helps maintain a consistent temperature throughout the cooking process.
Heating the Water
Place the saucepan over medium heat and bring the water to a gentle boil. It’s best to start with cold water and gradually heat it to avoid sudden temperature changes, which could cause the eggs to crack.
Adding Salt or Vinegar (Optional)
Some people prefer to add a small amount of salt or vinegar to the boiling water. The salt helps season the eggs, while vinegar can prevent the whites from seeping out in case of any cracks. These additions are optional but can enhance the final result.
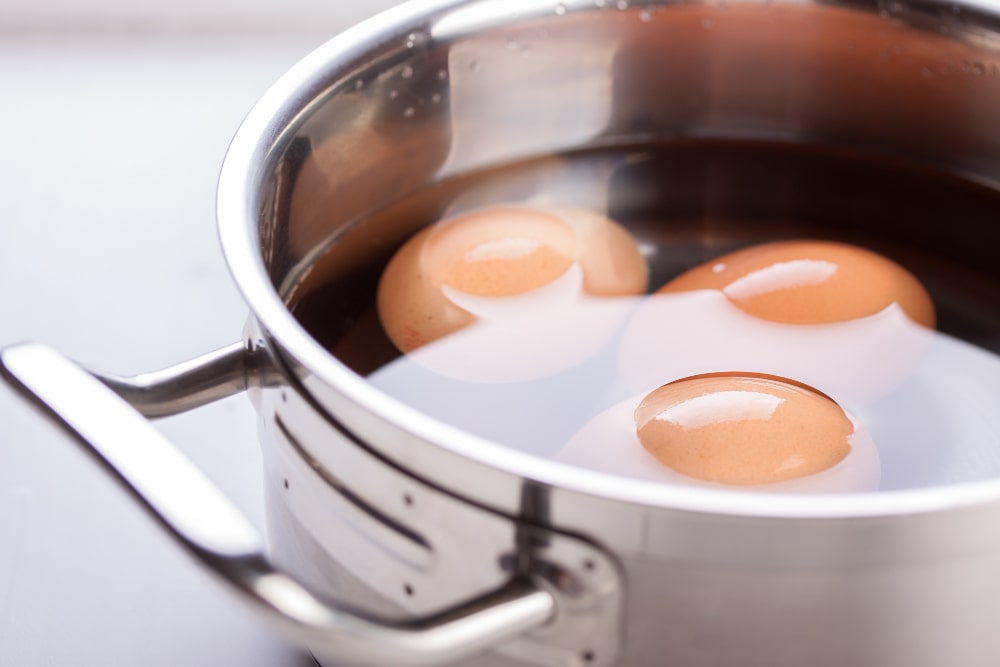
Adding the Eggs
Carefully lower the eggs into the boiling water using a slotted spoon. Avoid dropping them from a height, as this can increase the risk of cracking. Place the eggs gently to ensure they are fully submerged in the water.
Setting the Timer
Timing is crucial for achieving the desired level of doneness. The cooking time depends on whether you prefer soft-boiled or hard-boiled eggs. Let’s explore the options:
Soft-Boiled Eggs
If you’re aiming for soft-boiled eggs with a partially set yolk and a runny center, cook the eggs for approximately 4 to 6 minutes. The exact timing may vary depending on the size of the eggs and the desired level of softness.
Medium-Boiled Eggs
Medium-boiled eggs have a slightly firmer yolk while still maintaining a soft center. Cook the eggs for about 7 to 9 minutes for a medium-boiled result.
Hard-Boiled Eggs
Hard-boiled eggs have a fully set yolk and a firm white. Cook the eggs for about 9 to 12 minutes for a hard-boiled result. The longer cooking time ensures a fully cooked yolk without any traces of softness. You can adjust the time slightly if you prefer a softer or firmer yolk.
Overcooking
Be cautious not to overcook the eggs, as this can lead to a rubbery texture and a greenish-gray ring around the yolk. If you accidentally leave the eggs in the boiling water for too long, quickly transfer them to an ice bath to halt the cooking process.
Recipe-Specific Timing
Some recipes may require specific egg doneness. Always refer to the recipe instructions for precise cooking times. Experimentation is key to finding the perfect timing for your favorite recipes.
Now that you’ve mastered the cooking timing, it’s time to move on to the crucial steps of cooling and peeling.
Cooling and Peeling
Properly cooling the eggs and peeling them can make or break your boiled egg experience. Follow these steps:
Cooling the Eggs
After the eggs have reached the desired doneness, promptly remove the saucepan from heat. Carefully drain the hot water and replace it with cold water or an ice bath. The cold water stops the cooking process and makes the eggs easier to handle.
Peeling the Eggs
Peeling boiled eggs can sometimes be challenging, but with the right technique, it becomes much easier. Gently tap the eggs on a hard surface to crack the shell. Roll the eggs between your hands, applying gentle pressure to loosen the shell. Start peeling from the wider end of the egg, where there’s usually an air pocket. Peeling under running water can help remove any stubborn shell fragments.
Storage Considerations
If you don’t plan to consume the eggs immediately, store them in the refrigerator. Place the peeled or unpeeled eggs in a covered container to prevent them from absorbing odors. Boiled eggs can be stored in the refrigerator for up to one week, but it’s best to consume them within a few days for optimal taste and texture.
Serving and Storage
Boiled eggs can be enjoyed in various ways, and they
make a versatile addition to many recipes. Let’s explore some serving and storage options:
Serving Suggestions
– Enjoy soft-boiled eggs with a sprinkle of salt and pepper, accompanied by toasted soldiers for dipping.
– Create a classic egg salad by mashing hard-boiled eggs with mayonnaise, mustard, and seasonings. Serve it on bread or as a filling for wraps and sandwiches.
– Use sliced boiled eggs as a topping for salads, adding a protein boost and a touch of creaminess.
– Deviled eggs are a crowd-pleasing appetizer. Cut hard-boiled eggs in half, remove the yolks, mix them with mayonnaise, mustard, and spices, and fill the egg whites with the mixture.
Storing Boiled Eggs
– If you’ve peeled the eggs, store them in a covered container in the refrigerator to maintain freshness and prevent them from drying out.
– If the eggs are still in their shells, it’s best to store them in the refrigerator as well. You can place them in an egg carton or use a covered container.
– Remember to label the container with the date to keep track of their freshness.
Now that you know how to serve and store boiled eggs, let’s explore some common mistakes to avoid.
Common Mistakes to Avoid
Even experienced cooks can make mistakes when boiling eggs. Here are some common pitfalls to steer clear of:
Starting with Hot Water
Starting with hot water instead of cold water can lead to uneven cooking and potential cracking. Always begin with cold water and gradually heat it.
Boiling Eggs Straight from the Fridge
Boiling eggs straight from the fridge can result in uneven cooking. Allow the eggs to come to room temperature for about 10 to 15 minutes before boiling.
Undercooking or Overcooking
Timing is crucial for achieving the desired doneness. Be attentive and follow the recommended cooking times to avoid undercooked or overcooked eggs.
Not Piercing the Eggs
Skipping the step of piercing the eggs before boiling can lead to cracked shells and potential egg white leakage. Remember to gently pierce the rounded end of each egg before cooking.
Not Cooling the Eggs Properly
Skipping the cooling step or not cooling the eggs adequately can make them challenging to peel. Ensure you cool the eggs in cold water or an ice bath to halt the cooking process and facilitate easier peeling.
Alternative Methods
While boiling eggs on the stovetop is the most common method, there are alternative methods you can explore:
Steam-Boiling
Steam-boiling is an alternative method that can yield excellent results. Place a steamer basket or a metal colander over a saucepan filled with an inch of water. Bring the water to a boil, add the eggs to the basket, cover, and steam according to the desired doneness.
Electric Egg Cookers
Electric egg cookers offer a convenient way to boil eggs. Simply add water to the designated chamber, place the eggs in the cooker, and select the desired doneness. The cooker handles the timing and automatically shuts off when the eggs are cooked.
Experimenting with alternative
methods can help you find the technique that suits your preferences and yields the desired results.
Frequently Asked Questions (FAQs)
1. Can I reuse the boiling water for multiple batches of eggs?
It’s best to use fresh water for each batch of eggs to ensure consistent results. Reusing the boiling water may lead to variations in temperature and affect the cooking time.
2. Why do some eggs crack during boiling?
Eggs can crack during boiling due to various reasons, such as a sudden temperature change, inadequate piercing, or overcrowding in the saucepan. Taking precautions like gradually heating the water, gently piercing the eggs, and avoiding overcrowding can minimize the risk of cracking.
3. How can I prevent the greenish-gray ring around the yolk?
The greenish-gray ring, known as the ferrous sulfide reaction, forms when eggs are overcooked or cooked at high temperatures for too long. To prevent this, follow the recommended cooking times and promptly cool the eggs after boiling.
4. Can I boil eggs in the microwave?
While it’s possible to boil eggs in the microwave, it’s not recommended. The eggs can explode due to steam buildup. If you prefer a quicker cooking method, consider using an electric egg cooker or a stovetop steam-boiling technique.
5. How can I determine if an egg is still fresh?
An easy way to check the freshness of an egg is the float test. Place the egg in a bowl of water. If it sinks to the bottom and lies flat on its side, it’s fresh. If it stands upright or floats, it’s best to discard it, as it’s no longer fresh.
6. Can I boil eggs without the shells?
Boiling eggs without the shells, known as “naked” eggs, is possible. However, it’s important to note that without the protective shell, the eggs can absorb flavors and odors from the cooking liquid. If you choose to boil shell-less eggs, consider using a suitable container or cooking pouch to prevent direct contact with the cooking water.
Conclusion
Mastering the art of boiling eggs opens up a world of culinary possibilities. Whether you prefer soft-boiled, medium-boiled, or hard-boiled eggs, the key lies in proper preparation, timing, and cooling. By following the steps outlined in this guide, you can confidently achieve perfectly boiled eggs every time.
Remember to choose fresh eggs, pierce them before boiling, and organize your cooking space. Use the appropriate saucepan, add enough water, and bring it to a gentle boil. Set the timer according to your desired doneness, and promptly cool the eggs to make peeling easier. Finally, explore various serving options and storage methods to enjoy boiled eggs at their best.
So, what are you waiting for? Gather your eggs, get your saucepan ready, and embark on a delightful culinary adventure. With the knowledge and techniques from this guide, you’ll soon become a master in boiling eggs to perfection!
Return to markantony.org for more How-to Guides and Unlocking Knowledge and Mastering Skills.